Slime Time Game for Kids

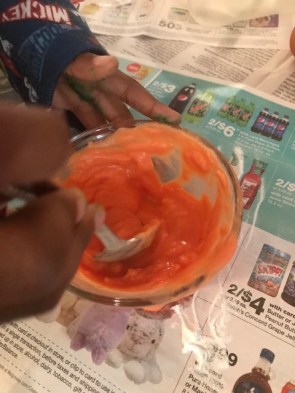
One day my son came home from daycare with DIY Slime. He could not wait to show it off after he greeted me with a kiss and hug. It was in a yellow container and sparkled with glitter.

We decided to take the slime out the container to play with it. It was sticky, slimly, ooey, gooey, and fun to play with. We smashed and constructed it in to various shapes.

About 30 minutes before dinner, we decided to make up an activity called the Slime Time Game. The game is simple and will encourage your child to think on their feet while being creative. This is a great indoor activity for rainy and cold days. Below I will explain how to play.

Let’s get started!

Materials Needed:

How to Play:

  • Give your child the slime.
  • Let them play with it for a while to get used to shaping and forming it.
  • I encourage you to play with the slime as well.
  • Tell your child they have a certain amount of time to make a letter, number, shape, or image.
  • During the first round of the game, I told my son he had 45 seconds to make the letter A.
My son made the letter A in 25 seconds.


  • Have your child give you the slime.
  • Have them tell you to make something in a certain amount of time.
  • My son asked me to make the number 89 in 40 seconds.
I made the number 89 in 30 seconds. This slime was very sticky.

Watch this video of my son making the letter H in 30 seconds.

We had a lot of fun with this activity. It kept us busy for about 35 minutes! It is great for letter, shape, and number recognition.

Have fun with this!

OUR KID FRIENDLY FAST & FUN STUDY TRICKS FOR BETTER GRADES: 9 FUN STRATEGIES FOR SUCCESS IN LEARNING AND SCHOOL HAS $29 OFF THE ORIGINAL PRICE.

Our books are available on Amazon, “Teach Your Toddler to Read Through Play,” “Fun Easy Ways to Teach Your Toddler to Write, and “Teach Your Child About Money Through Play.“

THE TEACH YOUR TODDLER TO READ THROUGH PLAY ONLINE COURSE HAS A $97 DISCOUNT.

Click here for the PAYMENT PLAN OPTION!

Egg Volcano Experiment for Kids

My son loves science experiments that are messy and incorporate mild explosions. When I saw this experiment, I knew we had to do it. Like many of the science experiments we do, all the ingredients were in our home.

We liked this activity because it was simple and fun. It requires you to use boiled eggs. I used this as an opportunity to expose my son to the science of cooking. While boiling the eggs, we discussed how cooking is transferring energy from a heat source, the stove, to the food. In other words, heat changes food.

Try this experiment at home! Your kids will love it. Doing science experiments will help your child become a better reader.

Let’s Get Started!

Materials:

  • Bowls for each color you would like
  • Water
  • Paint Brush
  • Baking Soda
  • Measuring Spoons
  • Food Coloring
  • Vinegar
  • Drinking Glass or Plastic Glass – big enough for an egg
  • Plastic container – something to catch the overflow of the liquid
  • Hard boiled eggs
Egg Volcano material. I am missing the small bowl in this picture.

Directions

  • Combine and mix water, baking soda, and a few drops of food coloring to make a paste.
My son is putting red food coloring in water.
Making the paste with water, baking soda, and food coloring
  • Fill the drinking glass with vinegar 1/2 full
Plastic Glass of Vinegar
  • Put the glass of vinegar in the plastic container
  • Use the paint brush to paint the egg with the paste
    • For a bigger reaction, put a thick coat of paste on the egg
My son is painting the egg with the paste.
  • Lower the egg in the glass of vinegar.
  • Now watch the Bubble, Fizz, and Overflow!
Egg Volcano Explosion!

WHY IT WORKS?

  • Baking Soda is a base and Vinegar is an acid.
  • When Baking Soda and Vinegar mix, the hydrogen ions in the vinegar react with the sodium and bicarbonate ions in the baking soda.
  • This mix is the result of two new substances called carbonic acid and sodium acetate.
  • There is a second reaction called decomposition reaction.
  • Decomposition reaction is when carbonic acid is formed.
  • The carbonic acid is decomposed into water and carbon dioxide gas causes the bubbling action.

I hope you like this experiment!

OUR KID FRIENDLY FAST & FUN STUDY TRICKS FOR BETTER GRADES: 9 FUN STRATEGIES FOR SUCCESS IN LEARNING AND SCHOOL HAS $29 OFF THE ORIGINAL PRICE.

Our books are available on Amazon, “Teach Your Toddler to Read Through Play,” “Fun Easy Ways to Teach Your Toddler to Write, and “Teach Your Child About Money Through Play.“

THE TEACH YOUR TODDLER TO READ THROUGH PLAY ONLINE COURSE HAS A $97 DISCOUNT.

Click here for the PAYMENT PLAN OPTION!

Fun Thermometer Science Experiment for Kids

One day my son and I were watching the Temperature Investigation episode of Sid the Science Kid cartoon. Cory was two-years-old the first time he watched it. After the episode ended, we decided to do the science experiment showcased on the cartoon. My son learned a lot about thermometers and temperature change during this activity.

Fall is coming soon and our children will witness a drop in temperature. Do this simple experiment at home to help your child learn about temperature changes in nature. I am pretty sure you have all the materials in your kitchen.

Let’s Get Started!

Materials Needed:

Method:

  • Put ice in the bowl
  • Put the thermometer in the ice
The temperature on the thermometer was originally 75°F or 23° C but it decreased to 50° F or 10° C in this picture.
  • Open the instant grits or oatmeal packet.
  • Pour the ingredients from the packet in a second bowl.
  • Pour hot water in the bowl and stir to mix.
  • Put the thermometer in bowl.
  • You will see the temperature on the thermometer go up.
The temperature started at 20° F or -6° C and increased to over 100° F or 37° C.

  • Try putting ice in the bowl of grits or oatmeal and observe what happens to the temperature.
  • Hint: It should decrease.

Watch the video below to see our experiment.

IMG_9798

Have fun with this activity!

Bonus

Explain to your child how a real thermometer works

  • Thermometers usually have alcohol in them.
  • The alcohol changes its size in the thermometer which causes the temperature to increase or decrease.

OUR KID FRIENDLY FAST & FUN STUDY TRICKS FOR BETTER GRADES: 9 FUN STRATEGIES FOR SUCCESS IN LEARNING AND SCHOOL HAS $29 OFF THE ORIGINAL PRICE.

Our books are available on Amazon, “Teach Your Toddler to Read Through Play,” “Fun Easy Ways to Teach Your Toddler to Write, and “Teach Your Child About Money Through Play.“

THE TEACH YOUR TODDLER TO READ THROUGH PLAY ONLINE COURSE HAS A $97 DISCOUNT.

Click here for the PAYMENT PLAN OPTION!

FREE Mini Course: Teach Your Toddler to Read Through PLAY

The title of this post can be a shock to some people. A toddler reading is an abnormal concept to many humans.

This can be a normal concept for any child who likes to play, explore, and learn. It is not reserved for children who we think are geniuses. All kids are born creative geniuses. We just have to find playful ways to foster their curiosity.

My son, Cory, started spelling and reading at 21 months through play. While running errands in stores with me as a one-year-old, Cory would identify letters, numbers, and read three and four letter words on signs.

Parents would approach me and ask if he was really reading. Of course I would reply by saying “yes”. Their next question would be, “How is he doing this?”

I could have talked with them for an hour telling them how he learned through toys, singing, dancing, acting, playing outside, and reading.

Below is video of my son at 25 months reading a book to me just before bedtime.

Cory-reading-at-25-months

This is why I have created the FREE Mini Course: Strategies to Teach Your Toddler to Read Through Play. It gives you strategies to make reading fun, natural, and stress free for you and your child. This includes some of the techniques I used with my son to expose him to words, reading, and reading comprehension in a fun way. 

This training is a four-part series. Below is what you will learn in the first video…

  • The learning system I used to teach my son to read.
  • How I address the objections people have about teaching a child to read as a toddler.
  • The one mistake parents make when reading to their child.
  • And so much more!

By the end of this video, you will know how to read aloud to your child in a way that creates meaning and connection! This will strengthen your child’s reading comprehension skills faster!

In the second video you will learn about the One Million Gap and How to Beat it!

In the third video, I will reveal the 10 Components Needed to Teach Reading in a Fun Way!

The fourth video reveals how to take your child’s learning and reading to the next level. You will also see my son spelling at 21 months and reading on a third grade level as a three-year-old.

Watch the BONUS video below with fun tips to expose babies and toddlers to words and reading.

Complete the form below to access the FREE Mini Course: Strategies to Teach Your Toddler to Read Through Play

See you there!

Alphabet Letter Hunt Activities – Three Variations

One night after taking a bath, my son suggested an activity/game for the next day called, Letter Hunt. I was intrigued by his suggestion and asked him how to play. Cory said “We will find all the letters in the alphabet in one room.”

The next day, we played the game he suggested and had a blast. We also played two other variations of the game. This activity is great for letter recognition and it allows children to get physical. Play this game even if your child knows their letters.

My son is very familiar with the alphabet but still had fun with this activity. It was raining outside when we played the game and that resulted in perfect timing.

Let’s Get Started

Letter Hunt- Variation 1

Materials:

  • Children and adults

Directions:

  • Tell your child you will do a letter hunt by going around a room or your home to search for letters.
  • You may find letters anywhere in your home such as magazines, signs, toys, shoes, books etc.
  • Keep playing the game until you find letters A-Z
My son found the letter A on his Paw Patrol Slipper.
Found the letter C on a box.

Letter Hunt – Variation 2

Materials:

  • Foam Letter or Magnetic letters
  • You may also use letters you have written on paper

Directions:

  • Hide letters A-Z around a room
  • Have your child(ren) find the letters and put them in a pile.
My son hunting for the letters I hid.

Letter Hunt – Variation 3

Materials:

  • Markers
  • Craft Paper or Poster Board Paper
  • Foam letters or Magnetic letters
  • You may also use letters you have written on paper

Directions:

  • Draw a chart on craft paper with your name or initial on one column and your child’s name or initial in the another column.
  • You and your child will get two different letters.
    • For example, your child will get letter A and you will get letter B.
Cory picking the letter he will soon hide.
  • Have your child hide the letter A in a room without you looking.
  • You hide the letter B in a room and ensure your child is not looking at where you are hiding it.
  • Now both of you go find the letters each one of you hid.
    • For example, you will find the letter A and your child will find the letter B
  • Whoever finds the letter first wins a point that round.
  • Have your child record the points on craft paper for each round.
Keeping score for our Letter Hunt. Clearly I am losing the game.
I am trying to find where Cory hid his letter. He had great hiding spots.


Have Fun Playing and Learning!

OUR KID FRIENDLY FAST & FUN STUDY TRICKS FOR BETTER GRADES: 9 FUN STRATEGIES FOR SUCCESS IN LEARNING AND SCHOOL HAS $29 OFF THE ORIGINAL PRICE.

Our books are available on Amazon, “Teach Your Toddler to Read Through Play,” “Fun Easy Ways to Teach Your Toddler to Write, and “Teach Your Child About Money Through Play.“

THE TEACH YOUR TODDLER TO READ THROUGH PLAY ONLINE COURSE HAS A $97 DISCOUNT.
Click here for the PAYMENT PLAN OPTION!

10 Components Needed When Learning to Read

Thank you so much for being here! I love sharing tips on fun accelerated learning for kids. Kids are so fun and their imaginations are always at play. Let’s use this to make reading fun for our children!

I hope you enjoyed the first and second video in the FREE Mini Course: Strategies to Teach Your Toddler to Read Through Play.

This includes some of the techniques I used with my son to expose him to words, reading, and reading comprehension in a fun way. 

Now you have come to the final video in this training. You will receive my biggest tips here. 

You will learn…

  • 10 Components needed when exposing your child to new words and reading with examples of activities
  • FREE Course on how to Teach the Alphabet in a Fun Way
  • How to use digital media and technology in your child’s learning
  • How to use the world as your child’s learning playground
Toddler-Reading-In-Depth-Learning-Part-3

Below is a PDF File of 10 Components Needed When Learning to Read.

10_Components_Needed_When_Learning_to_Read.pptx

Thank you again for joining me! I hope you have found this information valuable.

Andrea

CHECK OUT THE TEACH YOUR TODDLER TO READ ONLINE COURSE WITH OVER 130 GAMES/ACTIVITIES, TIPS, AND RESOURCES

Giant Bubbles for Kids

One day I got an email from Kiwico.com about DIY science experiments. I saw directions on how to make giant bubbles. I could not wait to show my son, Cory, the bubble activity. Once he saw it, he was excited to get started.

We had all the materials in our home except one item, push pins. We immediately went to the store and purchased the push pins and started to build the wand for the giant bubbles.

If you do this activity once with your child, it will not be your last. So far, we have done the activity three times. The first time, Cory was excited at how big the bubbles were. However, we wanted them to be bigger. So like scientists, we tested and adjusted our approach. The second time was even better than the first.

So let’s get started with how to do this fun activity.

Below is a video of how it is done. This video comes from my son’s YouTube Channel, Corban’s Fun Learning Adventures. Please like and subscribe for weekly fun learning activities. There are also written directions below for Giant Bubbles.

Materials:

Directions:

  • Gather materials to make the giant bubble wand and bubble solution.
  • Start creating the giant bubble wand by sticking a pushpin into the end of each dowel. Don’t push it in all the way but keep the pin about a 1/8-inch from the dowel.
We put the pushpin in about 1/8 inch from the dowel.

  • Cut a piece of yarn about 4 feet long.
  • Tie one end of the yarn to the exposed metal part of the push pin.
  • Push the pin into the dowel to hold the knot
  • Thread the yarn through the washer.
  • Tie the other end of the yarn around the push pin on the second dowel.
  • Push the pin in to hold the knot.
  • Cut a shorter piece of yarn that’s about 18 inches long.
  • Tie the ends to the longer yarn a few inches away from the dowels.
  • This should create a triangular shape.
  • Now it is time to make the bubble solution.
  • Mix 1 part dish soap, 4 parts warm water, add a teaspoon of glycerin, and stir well.
  • Using the dowels, dunk the yarn and washer into the solution.
  • Lift up the dowel and hold it out so the triangular shape opens up.
  • Walk the dowel around to see the giant bubble take form.

  • We liked these bubbles but wanted them bigger.
  • Therefore, we made some adjustments.
  • We made the yarn longer by cutting it 6 feet instead of 4 feet.
  • My husband provided us with a bigger and heavier washer.
  • The shorter piece of yarn was cut to 30 inches instead of 18 inches.
  • We used Gazillion Bubbles because we did not have time to make our own bubble solution.
  • We also learned that bigger bubbles will pop MORE often in hot and dry weather. This weather makes the water in the bubble evaporate too quickly which causes the bubbles to pop.
  • In the picture below, it was cloudy and rainy outside.
  • The result was we made bigger and better bubbles.

Try this activity and have fun!

Don’t forget to check our two books, Teach your Toddler to Read Through Play and Fun and Easy Ways to Teach your Toddler to Write.

Balloon Rocket Fun Activity

My son loves balloons! He likes to inflate, toss, and hit them. So, when I saw this experiment, I knew we had to do it! This is a perfect activity for July 4th festivities!

You probably have all the materials in your home. Once your child does this activity, they will want to do it repeatedly. Have fun with this simple yet exciting activity!

You may watch us do this activity in real time in the video below. This video comes from my son’s YouTube channel, Corban’s Fun Learning Adventures. Please like and subscribe for fun learning activities.

Materials:

  • String
  • Balloon
  • Wide Straw
  • Tape
  • Two Chairs or Two Trees

Method:

  • Cut string about several feet long
    • The string will be the track for your balloon launch.
  • Cut the straw about 4″ long
  • Thread the string through the straw
String it through the straw
  • Tie the two ends of the string to two chairs or two trees
    • We tied the strings to two chairs
  • Blow up the balloon
Cory blowing up the balloon.
  • Pinch the opening of the balloon to keep the air inside
  • Tape the straw to the balloon.
    • You made need two people to help with this step.
We taped the straw to the balloon.
This is the second try. We taped the straw to the balloon. The yellow balloon burst on us.
  • Go to one end of the string and let go of the balloon opening
  • Watch the balloon zip across the string.
  • Watch the video below of our Balloon Rocket!

Don’t forget to check our two books, Teach your Toddler to Read Through Play and Fun and Easy Ways to Teach your Toddler to Write.

The Shape Game for Kids

One day I was perusing through the Children’s book section in the library and I saw the book Frida and Bear Play the Shape Game! by Anthony Browne and Hanne Bartholin. This book is about Frida helping Bear think of things to draw. In order to accomplish this, Frida draws a shape and gives it to Bear. Then she asks Bear to “Try to turn this shape into something.”

This book encourages readers and young artists to use their imaginations to get their creative juices flowing.

My son and I read this book one night before bedtime. He thought it was a neat book and suggested we play the Shape Game. This is exactly what we did.

I will show you how to play.

Materials:

  • Paper
  • Writing Utensil such as Crayons, Markers, or Pencils
  • Boogie Board (this is what we used instead of Paper and Writing Utensils)

Directions:

  • Draw any shape you like on paper or on the Boogie Board.
I started the game by drawing this shape.
  • Give the paper to your child and ask them to make the shape into a picture.
My son said he turned the shape into the letter Q.
  • Now have your child make a shape.
My son drew this shape.
  • Tell your child to give you the shape and you will make a picture from it.
I turned the shape into a horse.

My son and I had so much fun with this activity. He did not want to stop. He was excited to see what I made from his shapes.

This activity is great for spatial awareness and creativity! It is also fun to play while waiting for food in a restaurant or in a doctor’s office.

I drew this banana shape.
My son turned it into a whale.
I drew this shape.

My son said “Mommy, I turned your arch into a cave.

Have fun with this activity and be creative!

Don’t forget to check our two books, Teach your Toddler to Read Through Play and Fun and Easy Ways to Teach your Toddler to Write.

Pool Boats

Pool Boats is a simple, yet scientific activity to do with kids inside or outside of the home. This activity came about because my son had a fever and could not go outside. Although he had a fever, he still had a desire to play. So, we did this activity.

A week prior, my son asked me for a bathtub boat but we did not have one at the time. So, I started doing research on how to make a simple DIY boat at home and came across this activity at the library. We had coins and aluminum foil at home and my son said “Let’s do this now!”

I encourage you to do this activity outside! It is more fun this way, in my opinion! Additionally it is a great activity to teach your child about buoyancy.

Let’s Get Started!

Materials:

  • Kiddie Pool or Bathtub filled with water
  • Coins
  • Four 12 x 12 inch (30.5 x 30.5 cm) sheets of aluminum foil

Method:

  • Fill the pool or bathtub with water.
  • Put a flat piece of aluminum foil in water, edge first, and watch what happens.
  • Crumble up the second piece of aluminum foil.
  • Drop the foil in the water to see whether it floats or sinks
  • Form another piece of foil into a boat to see whether it will float
Our crumbled foil and foil boat are floating
  • Put coins into your foil boat. Determine how many coins you can add to the boat before it sinks.
  • Redesign your boat with another piece of foil to see whether you can get more coins in before it sinks.
  • My son decided to destroy the boat to see if it would sink.
In this picture he destroyed boat and it did sink.

The Science behind this activity

  • Buoyancy is the ability to float.
  • To make an object float that would not normally, your child has to change its shapes so it pushes out its own weight in water.
  • A flat sheet of foil is denser than water and sinks if you put in the edge first.
  • When you change its shapes to a boat, it pushes more water out of the way and can float.
  • Adding coins to the foil boat increases the weight of the boat, and when it get too heavy, it sinks.
  • The crumpled foil traps air inside the foil ball and makes it buoyant.
  • Tell your child that life jackets work the same way.
  • Life Jackets keep you afloat in water because it contains a lot of trapped air.

Other Activities to try

  • Test the buoyancy of other materials such as wood, plastic, and rock.
  • Compare what happens when you put a water balloon in the pool versus an air-filled balloon the same size.

Have Fun Experimenting!

Don’t forget to check our two books, Teach your Toddler to Read Through Play and Fun and Easy Ways to Teach your Toddler to Write.