Did you know that when your child is learning about shapes they are being introduced to geometry? Shapes are not only important to math but generally in life. A child who can identify shapes will learn how letters and numbers are formed.
This prepares them to have better handwriting skills.
For instance, the letter O is basically a circle. Also, shapes can be combined to make various pictures. For example, typically when a child draws a dog they include a horizontal oval for the body, rectangular shapes for the legs and tail, triangles for the ears, and circles for the nose and eyes.
The knowledge of shapes is useful for building, which is an introduction to engineering. My son learned so much about what shapes to use when building certain structures with his magnetic tiles. He learned that rectangles and squares make great bases or foundations for structures. Additionally, he noticed that hexagons resemble circles.
The houses he often creates are made of a cubes and triangular prisms. Furthermore, his towers are made with a combination of hexagons, squares, and triangles. As a result, he is able to use his knowledge of building basic structures to make more sophisticated towers.
My son knew the basic shapes as a one-year-old. If I called out a shape, he was able to point them out in books or choose the correct one and give it to me. This was mainly done through playing with shapes and reading various books on shapes.
Let’s talk about various ways to make learning about shapes fun.
Below are 6+ Fun Activities to Teach Kids Shapes

Create Your Own Shapes
- Take Q-Tips, put glue on it, and form them into shapes on paper. Pour glitter on the Q-tip to decorate the shape.
- Let your child take food such as grapes or crackers and form them into shapes during snack time.
- Build shapes with Legos, Magnetic tiles, sticks from outside or anything your mind can think of.

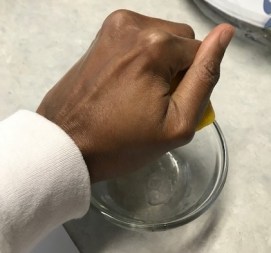
Make Shapes Disappear
- Go outside and make shapes with sidewalk chalk
- Call out a certain shape to your child
- Give your child a spray bottle with water, a cup of water, or water hose.
- Have your child pour or spray the water on the shape you identify to make it disappear.
Digital Media
My son and I love watching educational videos. Many times, after dinner, we dance, sing songs, or just watch videos about shapes on YouTube. Below are some YouTube videos about shapes.
*Please note that digital media should not be the only way your child learns the shapes. It should be a way to supplement what you have previously introduced to your child. In other words, expose your child to shapes first and then use digital media.
- Shapes Song 2 by KidsTV123
- Shapes Songs Collection Vol. 1 by Busy Beaver
- 3D Shapes Song | Shapes for Kids | The Singing by the Singing Walrus
- Shapes Song – 31 Kids Songs and Videos by Cocomelon
- Learn Shapes with Wooden Truck Toy – Colors and Shapes Video Collection for Children by Super Kid TV
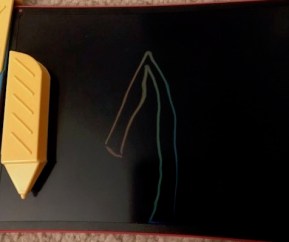
Play the Shape Game
- Draw one shape on paper like a circle
- Then give your child the paper
- Ask your child to create a picture from the shape.
- They can create a cat, monster, or anything they want
- Next, have your child draw shapes
- Then you create a picture from the shape they just draw

Read Multiple Children’s Book about Shapes
My son and I have read many books about shapes before nap and bed time. These books were colorful and included relatable characterers that my son liked. There were some that did not have characters but presented shapes in an engaging manner. Below are a list of seven children’s book about shapes.
- Color Zoo by Lois Ehlert
- Big Box of Shapes by Wiley Blevins
- Walter’s Wonderful Web by Tim Hopgood
- Mouse Shapes by Ellen Stoll Walsh
- Apples and Robins by Lucie Felix
- My Very First Book of Shapes by Eric Carle
- The Greedy Triangle by Marilyn Burns
Purchase Toys that Encourage Kids to Learn Shapes
- Geoboard – stretch the rubber band over the pegs to make various shapes.
- Tangram – use the seven shapes to create an image you want.
- Shape Puzzles – create role plays with the shapes puzzle pieces as characters.
Have Fun With This Activity!
Our books are available on Amazon, “Teach Your Toddler to Read Through Play,” “Fun Easy Ways to Teach Your Toddler to Write, and “Teach Your Child About Money Through Play.“
THE TEACH YOUR TODDLER TO READ THROUGH PLAY ONLINE COURSE HAS A $97 DISCOUNT.