Blowing bubbles is a fun activity to do with children. My son has loved them since he was a toddler. This is why we often do experiments that involve bubbles. In this post, we will show you how to do an easy science experiment for kids at home. Your child will learn how to make catchable bubbles.
Doing this project was exciting because bubbles pop once they touch your hands. However, this time, my son was able to catch and hold the bubbles.
My son received this kit for Christmas from a family member. He was so excited when he opened this present. The National Geographic Magic Science Kit has 10 experiments and comes with most of the materials you need within the kit. The other materials are items you have in your home like water.
The only materials you need (from your home) for the Bubbles experiment are…
We have completed three out of ten experiments in the kit so far. They all have a magical scientific component to it, which amazes kids. Most importantly, they are easy science experiments for kids at home.
In the video, below, we will show you what’s inside the kit and how we used it to make catchable bubbles.
This video below comes from my son’s YouTube Channel, Corban’s Fun Adventures and Learning. We have a lot of DIY projects, science experiments, and learning games there. Please subscribe if you like what you see.
Black History month is in February. This is a time to celebrate the contributions of black people to our world. In our household, my son and I learn black history year round. I am fortunate to be able to teach him black history because it is not taught within many our school districts. Today we will focus on black history inventors.
This black inventors t-shirt is available on Amazon! Click the image above to purchase the tee.
My son, Cory, loves doing science experiments and wanted to learn about black history inventors and their inventions. For example, it was fascinating for him to learn that Lewis Latimer invented the carbon filament for the light bulb. This invention made the light bulb shine longer and brighter. Mr. Lewis worked very closely with Thomas Edison.
Hands-On Learning
I try to think of hands-on projects to help my son remember black history facts. Therefore, we decided to make replicas of the inventions we read about through art. Below are some of the art projects my son completed.
Black History Inventors Art Projects
One of the first black history inventors we learned about was Benjamin Banneker. At the age of 20, he took a watch apart to study the pieces and to find out how it works. In 1753, at the age of 22, he built a wooden clock from his discoveries. Many people came all over to see his clock, as it kept perfect time for more than 50 years.
To celebrate Mr. Banneker, we decided to make our own clock. Below is how we did it…
Build Your Own Clock
Materials Needed:
Paper Plate
Scissors
Paint
Paintbrush
Glue
Black Marker
Construction paper (2 different colors)
Paper Brad
Directions:
Have your child build their own clock like Mr. Banneker.
Have your child paint the paper plate.
Cory paining the paper plate.
Draw a long and short clock handle on the construction paper.
This will represent the hour and minute hands.
Cut the handles out of the construction paper
These are the handles for the clock.
On another piece of construction paper, write numbers 1-12
Cut the numbers out individually and paste them on the clock
Poke a hole in the center of the paper plate
Insert the paper brad through the hour hand, minute hand, and the hole in the center of the paper plate.
Secure the paper brad by separating the tines of the legs and bend them over to secure the paper.
Here’s my son’s completed clock.
Another inventor we learned about was Phillip Downing. He created the street letter box, which was a tall metal box with a secure hinged door to drop letters. Before his invention, people who wanted to send mail had to go to the Post Office. The hinged door on the metal box prevented rain and snow from entering and damaging the mail. His invention allowed for people to drop their mail off near their home and to be picked-up by a mail carrier.
Our project below honors Mr. Downing’s contributions to our world…
Make Your Own Letter Box
Materials Needed:
Small or Medium sized cardboard box
Scissors
Blue sheets of construction paper.
Glue or Tape
Marker
Directions:
Explain to your child that Philip Downing created the street letter box to save us a trip to the Post Office and to prevent our mail from becoming damaged.
Tape the cardboard box shut.
With adult supervision, cut a rectangle hole on the box.
We taped our box and cut a rectangle in the center
Tape any parts of the box that may have come apart.
Glue or tape the construction paper on the box so that it is fully covered.
Here my son is cutting blue construction paper to fit around the box.
Write the world “Mailbox” on the cardboard box and tape it to the front.
My son is writing the word “Mailbox” on paper
Here is our letter box to honor Philip Downing
Optional: Have your children write a short letter and put it in your newly created mailbox.
Our Bonus Project
This year we decided to take it a step further and create something more memorable. We made a t-shirt to honor a few of the black inventors we learned about.
Valentine’s Day is around the corner. We love doing theme-based science experiments in our home. This year we decided to make a chemical love potion with ingredients we have on hand. This Valentine’s Day Science Experiment is fun and simple to do. Kids will be focused on creating a bubbly colorful potion, which is NOT meant to be consumed. Parents should do this activity with their children.
Kids and parents will learn patience while doing this Valentine’s Day Science Experiment. You have to use a specified amount of each ingredient in order for the chemical reaction to work. Once kids see the bubbly potion appear, they will be proud of their accomplishments.
Below is a video showing you how to make the love potion. We encourage you to follow the exact directions in the video.
One of the best ways for a child to learn is to incorporate what motivates them. My son is motivated by fun games. He loves winning and being competitive. Another thing that motivates him is his favorite toy, which are race cars. We needed to review multiplication, specifically the six times tables. Therefore, we created and played the Race Car Math Game.
Playing the Race Car Math Game
My son was so excited to play this game. He quickly got all the materials needed, which is listed below, for our competition. The rules were simple. You earn a point by having the fastest car and getting the multiplication problem correct.
We played this game for about one hour. At the end of the game, I was confident he knew his times tables. He was motivated to get the math problems correct because this was one way he accumulated points within the game. You can play this game with other math concepts such as addition, subtraction, and division.
Watch us play the game below. The video comes from my son’s YouTube Channel, Corban’s Fun Learning Adventures. Please subscribe and share if you like what you see.
Try this fun game with your children. If they like race cars, they are guaranteed to enjoy it.
My son loves to play with anything that launches or flies across the room. One of his favorite toys is the catapult. We built the catapult and played a fun game with it. It is more fun when you can actually make these types of toys. The benefits are numerous. For example, kids will understand how they work and can adjust them to their liking. Furthermore, children can make as many as they like and even give them out for gifts. We did this for the fun balloon project I will share with you in this post.
We call this project the Balloon Launcher. You only need five items, which you most likely have in your home. The process to making the launcher is very easy. You can play a game with the launcher to see who can shoot objects the farthest. The toy can be used at parties to celebrate another’s accomplishment or their birthday. Below is the process for executing this fun balloon project.
Below is a video showing you how to make the Balloon Launcher. This video comes from the YouTube Channel, Corban’s Fun Learning Adventures. Please subscribe and share if you like what you see.
We love to do simple activities that require household materials. These types of activities take a few minutes to set up and provide at least an hour or more fun for kids. The Colorful Milk Experiment is a great example of one of those activities. There is a ton of learning in doing this experiment as well.
Our first time doing the Colorful Milk Experiment, we were amazed at the results. My son was three at the time, and talked about the results for a week. Back then we called this activity the Milk Rainbow. You will need the following for this activity…
This experiment teaches kids how soap attaches to grease, which in this case would be the fat in the milk. Mixing the milk, soap, and food coloring results in a beautiful mixture of colors. We encourage you to try it with a variety of colors.
Below is a video showing you how to do the experiment. It comes from my son’s YouTube channel, Corban’s Fun Learning Adventures. Please subscribe if you like what you see on the channel.
Christmas is around the corner and kids will be home for the holidays. Sometimes kids get bored when they are in the house for long periods of time. If this happens, don’t worry because I have the perfect activity to beat the boredom. It is called the DIY Canvas for Painting. This is a great project to put on your “easy science experiments for home” list.
We will show you how to do this activity in the video below. First you will learn how to make Oobleck slime. Then you will paint on the Oobleck canvas you made. Kids will find this project fun and easy to do.
Making Oobleck is considered a scientific project because it is a non-newtonian fluid. This means it can change from a liquid to a solid and vice versa. Kids will use their artistic skills once they paint on the canvas.
Parents will love this project because you most likely have all the ingredients in your home. The ingredients needed for this project are as follows:
The holidays are a time of good cheer, time spent with family and friends, decorations, and relaxing from a hectic year. Unfortunately for our wallets, it’s also a time of deals, sales, and a last push to get all of our loved ones gifts for the holidays.
It can be easy for kids to see this indulgent behavior in their parents and family and think that they, too, should grow up and splurge on holiday gifts for their family and friends. However, by demonstrating smart budgeting habits, we can set our kids (and ourselves) up for success when it comes to gift giving around the holidays and birthdays.
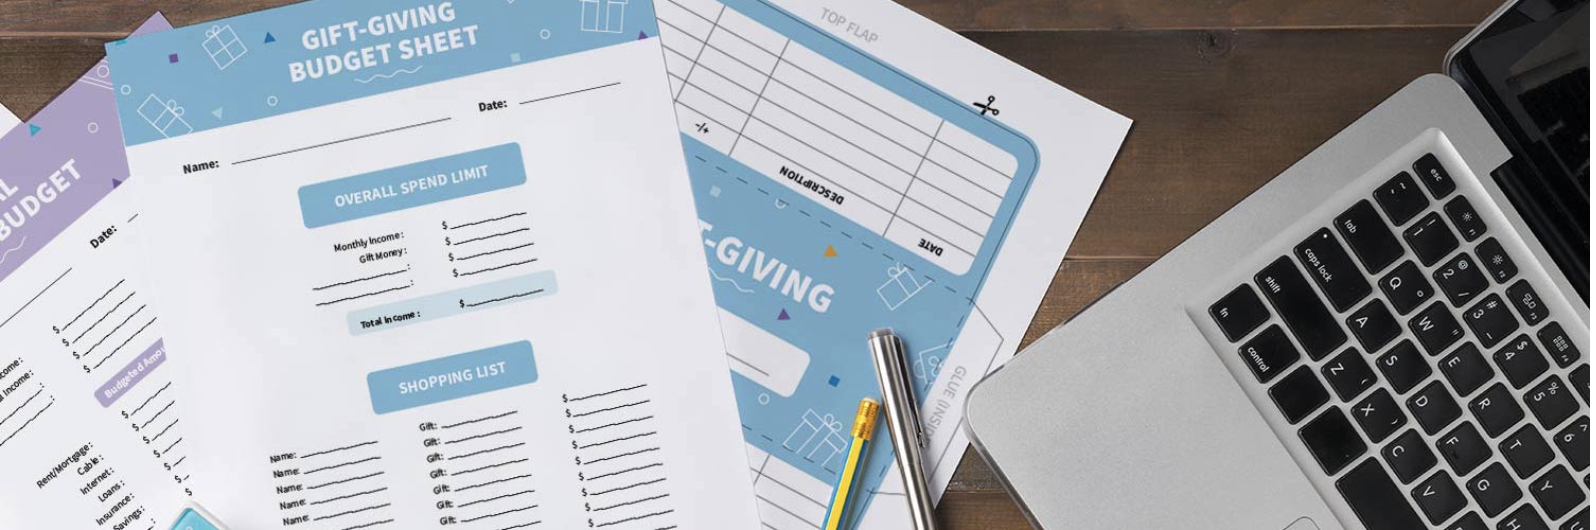
Through utilizing the cash envelope budgeting system, you’re able to plan ahead and save money to give gifts to loved ones, while removing the temptation to overspend or be blinded by deals while gift shopping. Essentially, the cash envelope budgeting system is where you fill an envelope with cash for a specific purpose: such as holiday gifts, a vacation, birthdays, or anything else you may be planning for.
To model good budgeting practices for kids, use these printable cash budgeting envelopes to put aside a certain amount of money together for shopping for holiday gifts. You can do this holiday activity as a family, and contribute a few dollars each every week. Once you reach your goal (or meet your savings deadline), you can go ahead and spend the money on that given purpose.
For more financial literacy resources click the image below.
Many of my family and friends havedominoes in their homes but do not use them much. Often times, people are not aware of the various ways to play with them. Dominoes is a fun and playful material where children can create a design and knock them down. Additionally, there is the famous Dominoes game where kids can match numbers.In this post, we will show you how to play dominoes for kids. You will see two fun games we made up.
In the video below, you will see a game that reinforces the math concept greater and less than. You will also see us playing a competitive building game.
The video comes from my son’s YouTube Channel, Corban’s Fun Learning Adventures. Please subscribe and share if you like what you see.
Christmas is almost here and the kids will be on holiday break from school soon. With that time off, they probably want to do some fun activities. So why not do an awesome scientific trick to amaze the family. We also have a library of other easy science experiments for home.
Today’s Activity
It is called the Spinning Pencil with Balloon. In this activity, you use a balloon to make a pencil spin. The trick is the balloon does not touch the pencil. This sounds impossible right? Well static electricity makes this activity a reality. Science is mind blowing!
When my son and I tried it, we were amazed. The great thing about this experiment is you only need three household items. They are…
In the video below, we show you how to execute this trick.
The video below comes from my son’s YouTube Channel, Corban’s Fun Learning Adventures. We have a bunch of science experiments, DIY projects, and learning games on this channel. Please subscribe and share if you like what you see.